Get a windows iso
Create new VM with virt-manager
open virt-manager
make sure you’ve connected to the QEMU/KVM (click the File option, then ‘Add Connection’, make sure hypervisor is selected to QEMU/KVM, and click connect)
now QEMU/KVM will show up that you can add a vm to:

Figure 1: create a new virtual machine with virt-manager
walk through basic options
select Local install media (ISO image or CDROM)

Figure 2: select windows 11 iso
Configure Memory and CPU
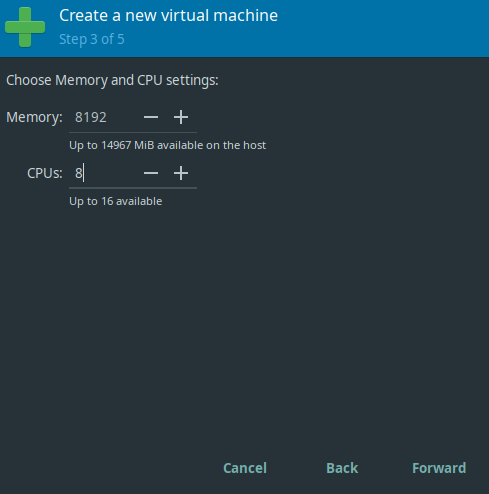
Figure 3: configure memory and cpu
Create a virtual hard disk
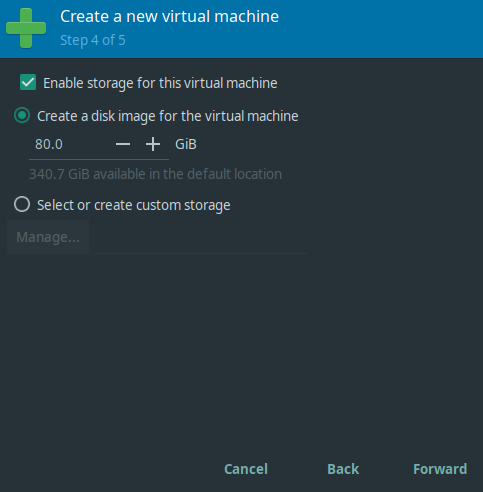
Figure 4: create a disk
Set VM name, Network, etc.
and make sure you select the option: Customize configuration before install.
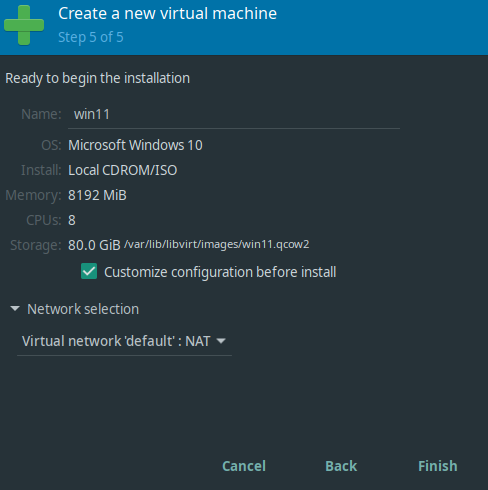
Figure 5: Name, Network, Customize
configure hardware
if you’ve selected the “Customize configuration before install” option, you’ll be lead to this hardware configuration prompt.
hard disk bus type
- Click on SATA Disk 1.
- Choose the disk bus as VirtIO
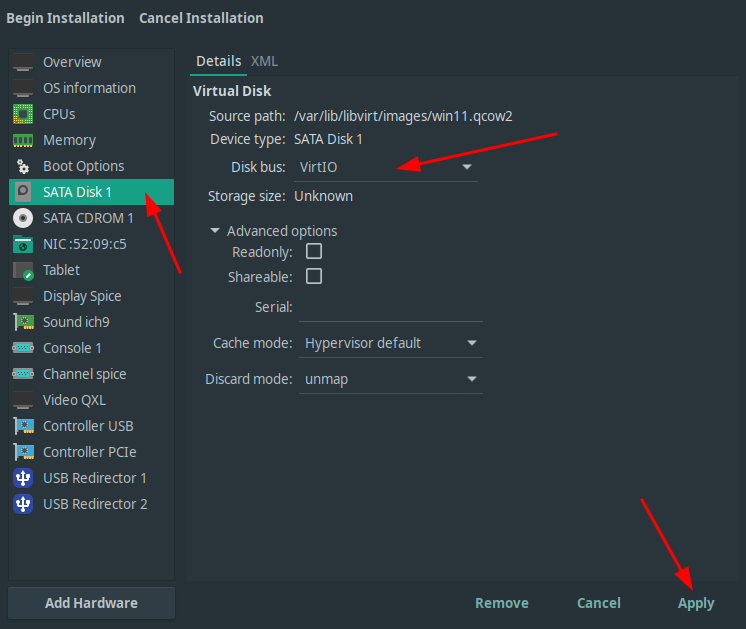
Figure 6: set disk bus tpe to VirtIO
network device model
also set network device model to virtio
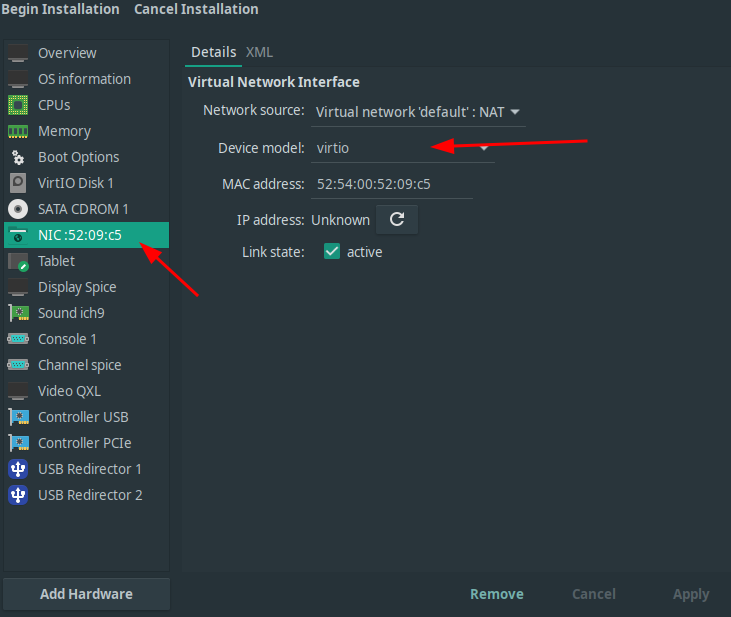
Figure 7: set network device model to virtio
add virtio driver
- click on Add Hardware
- select storage, click on manage, and attach the virtio driver you’ve downloaded
- choose device type as CDROM

Figure 8: add virtio driver
change boot order
make sure CDROM 1 is checked and at top.
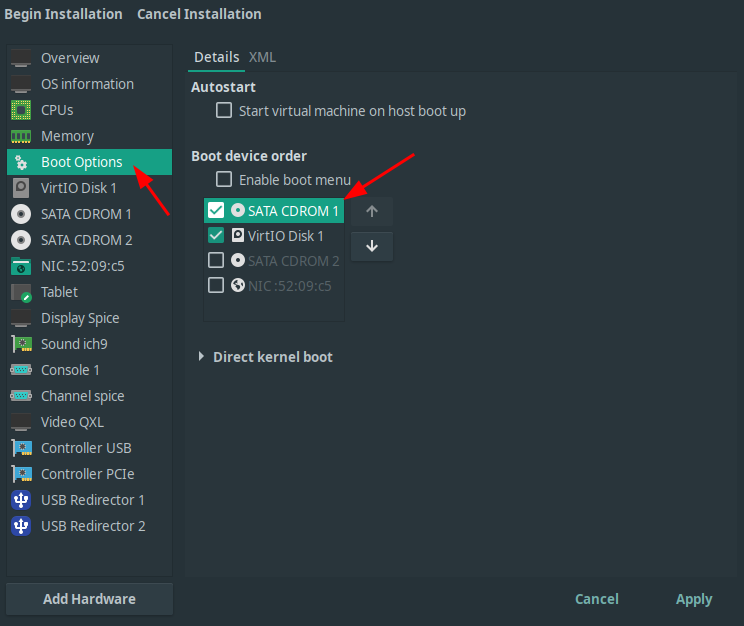
Figure 9: change boot order
(optional) enable TPM
Click on Add Hardware, Add the TPM as below.
Model – You will see two models, choose TIS,
Backend – select Backend as Emulated.
Version – 2.0
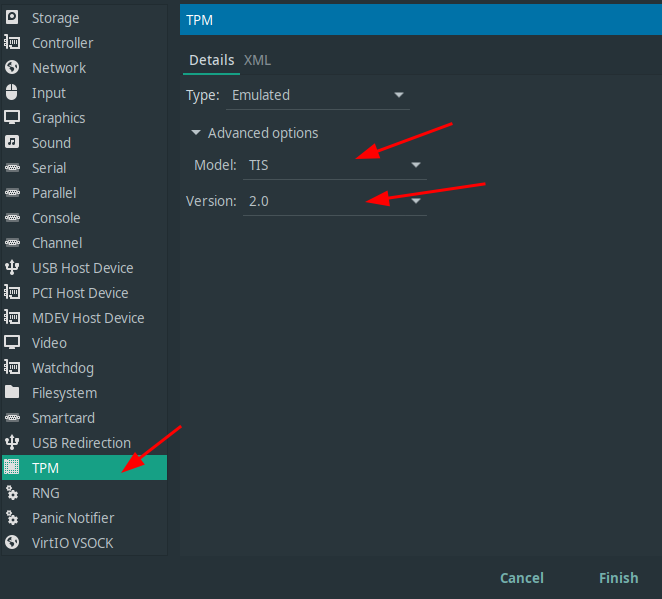
Figure 10: add TPM
(optional) enable Secure Boot
you need to install ovmf and swtpm
| |
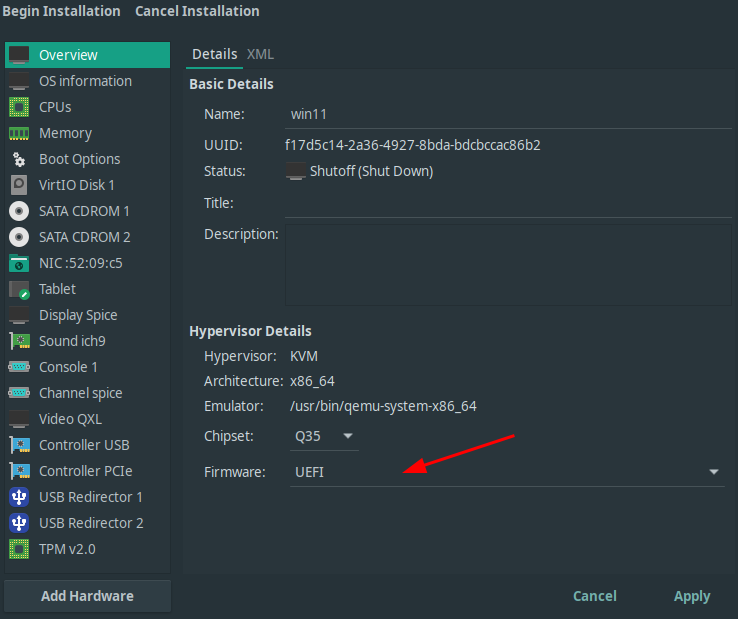
Figure 11: enable secure boot
Begin installation
bypass checks
Click Begin Installation button on the top left corner to start the installation process, then install Windows like you would on a normal PC.
If you haven’t enabled TPM 2.0 and secure boot, you’ll not meet the installation requirements of windows 11. But you can bypass these checks.
open command prompt with Shift+F10
| |
Similarly, you can disable other checks with: BypassSecureCPUCheck, BypassSecureRAMCheck, BypassSecureStorageCheck
Load driver
You won’t be able to find the virtio hard disk that you have added, click on Load driver. In the prompt, choose windows 11 driver, and click on Next.
Skip connecting to network
we don’t have the corresponding virtio driver yet, we’ll install it in the next section.
After installation
Install VirtIO Drivers
- Open the Windows Explorer and navigate to the CD-ROM drive.
- Simply execute (double-click on) virtio-win-gt-x64
- (optional) Use the virtio-win-guest-tools wizard to install the QEMU Guest Agent and the SPICE agent for an improved remote-viewer experience.
- (optional) Reboot VM
remove CDROMs
- Remove the windows installer iso after intallation.
- Keep the virtio iso.
file sharing
recommend sharing files between host and windows guest with samba.